

The following procedures help you install the Apache web server with PHP and MySQL support on your Amazon Linux instance (sometimes called a LAMP web server or LAMP stack).
Step 1
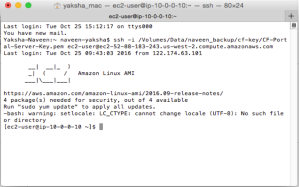
Connect Instance in terminal
Step 2
Chmod 400 Keyfile.pem
Step 3
ssh -i /Path_Location/CF-Portal-Server-Key.pem user@IP-Address
Step 4 install Htop
[ec2-user ~]$yum install htop
Once installed, just type htop at a terminal to launch it

Use the yum install command to install multiple software packages
Step 6
[ec2-user ~]$ sudo yum install -y httpd24 php56 mysql55-server php56-mysqlnd
Start the Apache web server.
Step 7 [ec2-user ~]$ sudo service httpd start
Use the chkconfig command to configure the Apache web server to start at each system boot.
Step 8
[ec2-user ~]$ sudo chkconfig httpd on

Test your web server. In a web browser, enter the public DNS address
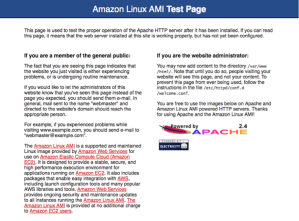
Apache httpd serves files that are kept in a directory called the Apache document root /var/www/html, which is owned by root by default.
Step 9
[ec2-user ~]$ ls -l /var/wwwTo allow ec2-user to manipulate files in this directory, you need to modify the ownership and permissions of the directory.
To set file permissions
Add the www group to your instance.
Step 10
[ec2-user ~]$ sudo groupadd www
Add your user (in this case, ec2-user) to the www group.
Step 11
[ec2-user ~]$ sudo usermod -a -G www ec2-user
Important
You need to log out and log back in to pick up the new group. You can use the exit command, or close the terminal window.
Log out and then log back in again, and verify your membership in the www group.
- Log out.
[ec2-user ~]$ exit
Reconnect to your instance

Step 12
[ec2-user ~]$ groups
Change the group ownership
Step 13
[ec2-user ~]$ sudo chown –R root:www /var/www Recursively change the file permissions of /var/www and its subdirectories
Step 14
[ec2-user ~]$ find /var/www -type f -exec sudo chmod 0664 {} \;
To test your LAMP web server Create a simple PHP file in the Apache document root. PHP file in the /var/www/html directory
Step 15
[ec2-user ~]$ echo “<?php phpinfo(); ?>” > /var/www/html/phpinfo.php In a web browser
Step 16
http://my.public.dns.amazonaws.com/phpinfo.php
Delete the phpinfo.php file
Step 17
[ec2-user ~]$ rm /var/www/html/phpinfo.php

To secure the MySQL server Start the MySQL server
Step 18
[ec2-user ~]$ sudo service mysqld start Run mysql_secure_installation.
Step 19
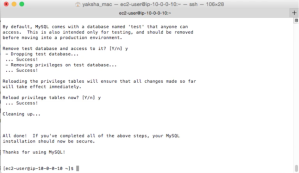
[ec2-user ~]$ sudo mysql_secure_installation
When prompted, enter a password for the root account
Enter the current root password. By default, the root account does not have a password set, so press Enter.

- Type Y to set a password, and enter a secure password twice
- Type Y to remove the anonymous user accounts.
- Type Y to disable remote root login.
- Type Y to remove the test database
- Type Y to reload the privilege tables and save your changes.
- Enable the Extra Packages for Enterprise Linux (EPEL) repository from the Fedora project on your instance.
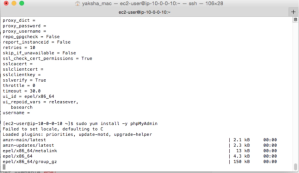
[ec2-user ~]$ sudo yum-config-manager –enable epel Install the phpMyAdmin package
Step 20
[ec2-user ~]$ sudo yum install -y phpMyAdmin
Configure your phpMyAdmin installation to allow access from your local machine
- Find your local IP address by visiting a service such as com.
- Edit the /etc/httpd/conf.d/phpMyAdmin.conf file and replace the server IP address (127.0.0.1) with your local IP address with the following command, replacing your_ip_address with the local IP address that you identified in the previous step.
[ec2-user ~]$ sudo sed -i -e ‘s/127.0.0.1/your_ip_address/g’ /etc/httpd/conf.d/phpMyAdmin.conf
Step 21
[ec2-user ~]$ sudo sed -i -e ‘s/127.0.0.1/your_ip_address/g’ /etc/httpd/conf.d/phpMyAdmin.conf

Restart the Apache web server to pick up the new configuration.
Step 22
[ec2-user ~]$ sudo service httpd restart
Restart the MySQL server to pick up the new configuration
Step 23
[ec2-user ~]$ sudo service mysqld restart
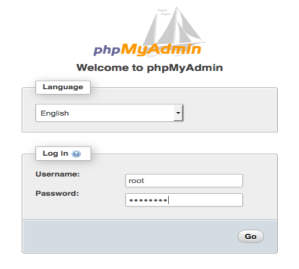
In a web browser, enter the URL of your phpMyAdmin installation
Step 24
http://my.public.dns.amazonaws.com/phpmyadmin
Forbidden :You don’t have permission to access /phpmyadmin on this server
Edit file phpMyAdmin.conf
Step 25
sudo nano /etc/httpd/conf.d/phpMyAdmin.conf
And replace this at the top:
<Directory /usr/share/phpMyAdmin/>
   AddDefaultCharset UTF-8

   <IfModule mod_authz_core.c>
     # Apache 2.4
     <RequireAny>
       #Require ip 127.0.0.1
       #Require ip ::1
       Require all granted
     </RequireAny>
   </IfModule>
   <IfModule !mod_authz_core.c>
     # Apache 2.2
     Order Deny,Allow
     Deny from All
     Allow from 127.0.0.1
     Allow from ::1
   </IfModule>
</Directory>

Step 26
sudo service httpd restart

For Upload database
Step 27
 mysql -u username -p database_name < file.sql
For Upload database
Step 27
mysql -u username -p database_name < file.sql

It’s Working. Nice Article
LikeLiked by 1 person
https://www.reliablesite.net/hosting-news/wordpress-on-dedicated-server/
LikeLike